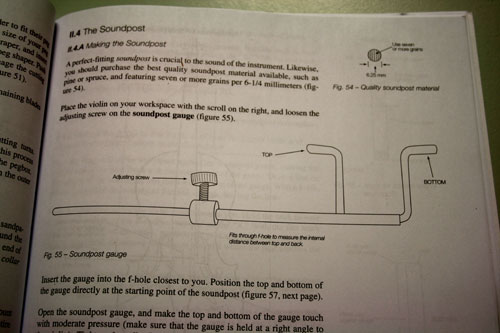
It occurred to me that once the top is on the violin, I will need to make a new sound post as the repair will have slightly changed the profile of the interior. There are two ways to ensure the correct length of sound post: firstly, you can guess and risk wasting precious sound-post timber, or you can measure the space and cut to size.
My book on violin repairing – which has precious little on repairing cracks! – recommends buying a sound post gauge. Luckily Atria’s book illustrates the principle quite well. And just recently I replaced the windscreen wiper blades on my car…
You see, the spine of the old wiper blades consisted of two thin strips of mild steel about 1 mm thick and 3 mm wide and about 300mm long. I decided to get dangerous with a pair of pliers.
Once I bent the two pieces so they would nestle into each other with opposing ends (already rounded so they won’t scratch the violin timber) I found a piece of clear plastic tubing (fuel line) – although you could use a drinking straw – and bound the two strips together with the tube, and then bent the ends over so they would be easy to grasp and slide the two pieces against each other to make the measurement. I also inserted a small timber wedge from an offcut so as to provide a good friction fit that would retain the measurement while extracting the tool from the F-hole.
And here is the result – a functional sound-post gauge.
And it works well. Happy luthiering 🙂


